
Smoked Turkey is the ultimate centerpiece for Thanksgiving or any holiday feast. This step-by-step recipe shows you how to smoke a whole turkey that’s juicy inside, crispy on the outside, and packed with rich smoky flavor. Whether you’re using a pellet grill, offset smoker, or ceramic cooker, you’ll learn exactly how to brine, season, and smoke your turkey to perfection.
Why You’ll Love This Smoked Turkey
If you’ve ever suffered through a dry holiday bird, this recipe is your redemption. The overnight brine keeps the meat moist, the higher cooking temperature crisps the skin, and a touch of fruitwood smoke gives it that signature BBQ flavor. It’s simple, reliable, and guaranteed to impress anyone lucky enough to grab a plate.
The Backstory
As a kid, I hated the holidays. I was a picky eater, and my family members weren’t the best cooks when it came to meat. Most proteins were tortured to the consistency of well-worn shoe leather and were devoid of any flavor. Turkeys prepared around Thanksgiving and Christmas were no exception. These birds were usually so dry even waterboarding them with an entire vat of gravy couldn’t wring out a mediocre eating experience. After enough complaints, the family finally decided to leave the cooking to a local deli. We happily ate that deli’s bird for at least a decade or more. Years later, I found my stride as a pitmaster, I suddenly found myself in charge of cooking a smoked turkey during the holidays. They cleaned the carcass of that very first turkey I prepared like a school of piranha. Through their hazy tryptophan-induced food comas pointed questions about my new found culinary skills came to light. “What the hell took you so long?” “We could have been eating this good years ago!” Do you know how much money we could have been saving?!” Sigh. Below is exactly how I returned the home-cooked bird to my family’s table.
So you wanna Smoke a Turkey (How to Smoke a Whole Turkey)
One of the biggest challenges to cooking a whole turkey is not drying the breast out before the dark meat is finished. The majority of the time breasts will hit the proper internal temp of 165 long before the dark meat. This happens with all poultry, but smoked turkey presents a bigger challenge due to its large size. There isn’t much you can do to prevent this other than cutting up the bird and cooking the pieces individually.

Why Presentation Matters
Sure, you could spatchcock the bird (remove the spine so it lays flat) or break it down into parts, and honestly, both methods make cooking easier. I even have a Spatchcock Chicken Recipe that shows how great that technique works.
Most people don’t like using these methods because they want a nice picture-perfect presentation in the middle of their formal living room table when they use it two or three times a year. If they are going to take the time to sweep the cobwebs out of that room for company, that damn bird better look like it came straight from a Martha Stewart segment, not something that’s been flattened by a tractor-trailer. A perfectly cooked, whole smoked turkey isn’t just food. It’s the centerpiece of the day.
How Trussing Helps (How to Tie a Turkey)
Trussing might look like a small step, but it makes a big difference in how your turkey cooks and looks. By tying the legs and wings snug against the body with butcher’s twine, you help the turkey cook more evenly and prevent the outer parts from drying out before the center is done.

It also keeps the shape tight and compact, which means easier handling on the smoker and a more polished look once it’s done. Think of it as the culinary equivalent of an iPhone filter. It keeps it looking neat, tidy, and ready for photos. After all is the meal really any good unless people post it on social media with a humble brag?
If you’ve never trussed a bird before, check out my guide on How to Truss a Turkey. The video shows me working with a chicken, but the technique is exactly the same. It’s simple, takes less than two minutes, and pays off in a big way.
How to Thaw a Turkey Safely
One of the most common mistakes people make is trying to brine or smoke a turkey that’s still partially frozen. It throws off your timing and can create serious food safety issues.
If you’re working with a frozen bird, start the thawing process four to five days before you plan to cook. The USDA recommends thawing in the refrigerator and allowing 24 hours for every 4–5 pounds of turkey. That means:
-
12-pound turkey → about 3 days
-
16-pound turkey → about 4 days
-
20-pound turkey → about 5 days
Keep the turkey in a pan or tray while it thaws to catch any liquid, and never thaw at room temperature — that’s a bacteria party waiting to happen.
Once it’s fully thawed, you’re ready to move on to the brine. Starting early is the best way to avoid that Thanksgiving morning panic when someone realizes the turkey’s still frozen solid.
My Strategy for Juicy Turkey
I’ve long since given up worrying about getting everything to hit the proper temperature at the same time. I just let the breast go to whatever the hell they want and concentrate on pulling the poultry out as soon as my thermometer reads 165 on the deepest part of the thighs. My strategy on keeping the meat moist and tender is to brine the whole bird 12 to 24 hours ahead of cooking. Notice I said strategy, not secret. Brining a piece of meat has long been a tool used by chefs and home cooks alike to retain moisture and impart flavor. Just be sure and have the turkey thawing in the fridge a few days prior to brining.
The Brine
Ingredients
-
½ gallon water
-
1½ cups kosher salt
-
2 cups sorghum (or substitute molasses)
-
2 lemons, halved
-
2 oranges, halved
-
½ cup Cajun seasoning (Tony Chachere’s is my go-to)
-
10 pounds ice

You’ll also need a 5-gallon food-safe bucket with a lid and enough refrigerator space to fit it. A cooler works too, and if you live somewhere cold, you can store it outdoors as long as the temperature stays under 40°F and no raccoons or neighbors decide to help themselves.
How to Make the Brine
Ok pay close attention. This is a very complex set of instructions with advanced techniques like boiling water and dumping ingredients into a pot.
1. Fill a large stockpot with ½ gallon of water and bring to a boil.
2. Throw all the remaining ingredients except the ice in the pot.
3. Cut the heat and stir until the salt and sorghum have dissolved in the water.
Brine complete. Terribly difficult wasn’t it?

How to Brine the Turkey
-
Pour about seven pounds of ice into your bucket.
-
Add the cooled brine.
-
Submerge your thawed turkey completely.
-
Top off with the remaining ice and weigh it down with a plate if it floats.
Keep the brine below 40°F for food safety. Brine for a minimum of 12 hours or roughly one hour per pound. A 15-pound turkey should soak for about 15 hours.
Before you drop that bird into the brine, make sure you pull out the neck and giblets. Everyone has a story about the time someone forgot, and the dinner guests found a little “bonus bag” cooked inside the cavity. Don’t be that guy.


How to Get Crispy Turkey Skin (Optional Drying Step)
If you have ever wondered how to get crispy turkey skin on a smoked bird, this is the secret. After the turkey finishes brining, remove it from the liquid, rinse it under cool water, and pat it completely dry with paper towels.
Place the bird on a wire rack set over a baking sheet and refrigerate it uncovered overnight, at least 8 hours. This allows the skin to dry and form a slightly tacky layer called a pellicle.
Professional chefs and Michelin-star restaurants use the same method when preparing roast chicken because it helps the skin dry out and crisp beautifully during cooking. The result is a turkey with Instagram-worthy looks and Food Network-level flavor. It is an optional step, but if you want your smoked turkey to stand out, this is a pro move worth the effort.
The Cook
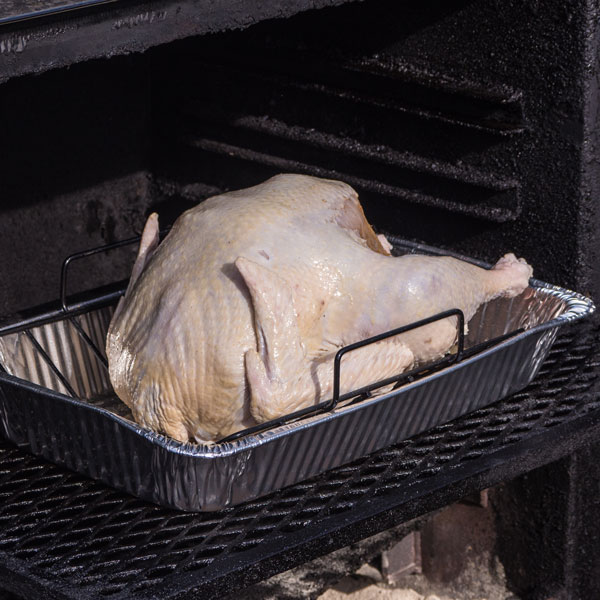
Set Up the Smoker
When the turkey has finished brining and drying, it is time to fire up the smoker.
Bring the temperature to 325°F. This range gives you the best of both worlds: juicy meat and crisp, browned skin.
As for wood, lighter is better with poultry. Fruitwoods like apple, peach, or cherry add a subtle sweetness that complements the turkey without overpowering it.
If you want a more traditional barbecue flavor, use oak or hickory. Be aware that these will have a strong smoke flavor.
Skip mesquite unless you like your turkey tasting like an ashtray.
Prep the Bird
When you are ready to start cooking, remove the turkey from the brine and rinse it under cool tap water. Pat the skin dry with clean paper towels. If you air-dried the turkey overnight, it will already have a slightly tacky surface called a pellicle that helps smoke and heat stick evenly. Either way, apply a light coat of butter or canola oil to the skin right before it goes on the smoker. The fat helps deepen the color, promote even browning, and trigger the Maillard effect. This chemical reaction is responsible for that rich, golden, crispy skin and roasted flavor. A 14–18 pound bird will need roughly 2½ to 3 hours for the dark meat to reach 165°F.

Check the Temperature
Use a reliable meat thermometer and probe the deepest part of the thigh near the hip joint. When it reaches 165°F, the turkey is done. The breast will usually land around 160°F, which is perfect since the carryover heat will bring it the rest of the way as it rests.
Once the turkey hits temperature, bring it inside and tent it loosely with foil. You do not need to rest a turkey as long as you would a brisket, but giving it 15 to 20 minutes before carving makes slicing easier and keeps the juices where they belong.
If dinner is still a while off, wrap the turkey in foil and place it in a clean cooler to keep warm. Do not reuse the same cooler you used for brining unless it has been cleaned, sanitized, and dried thoroughly.
Why You Need a Good Thermometer
A good thermometer is one of the most valuable tools you can own. Cheap versions are slow and inaccurate, and by the time they finally register, your meat may already be overcooked. On top of that, you will have spent half the cook with the smoker lid open, dumping heat and chasing temps that keep dropping.
Invest in a Thermapen for instant readings or a Meater remote thermometer if you want to track internal temps without opening the smoker lid. If you’re lookin’, you ain’t cookin’. Both make it easier to maintain consistent results and take the guesswork out of your cook. It’s a smart investment not just for your Thanksgiving turkey, but for every future barbecue, roast, and weeknight meal you cook.
Serving Suggestions
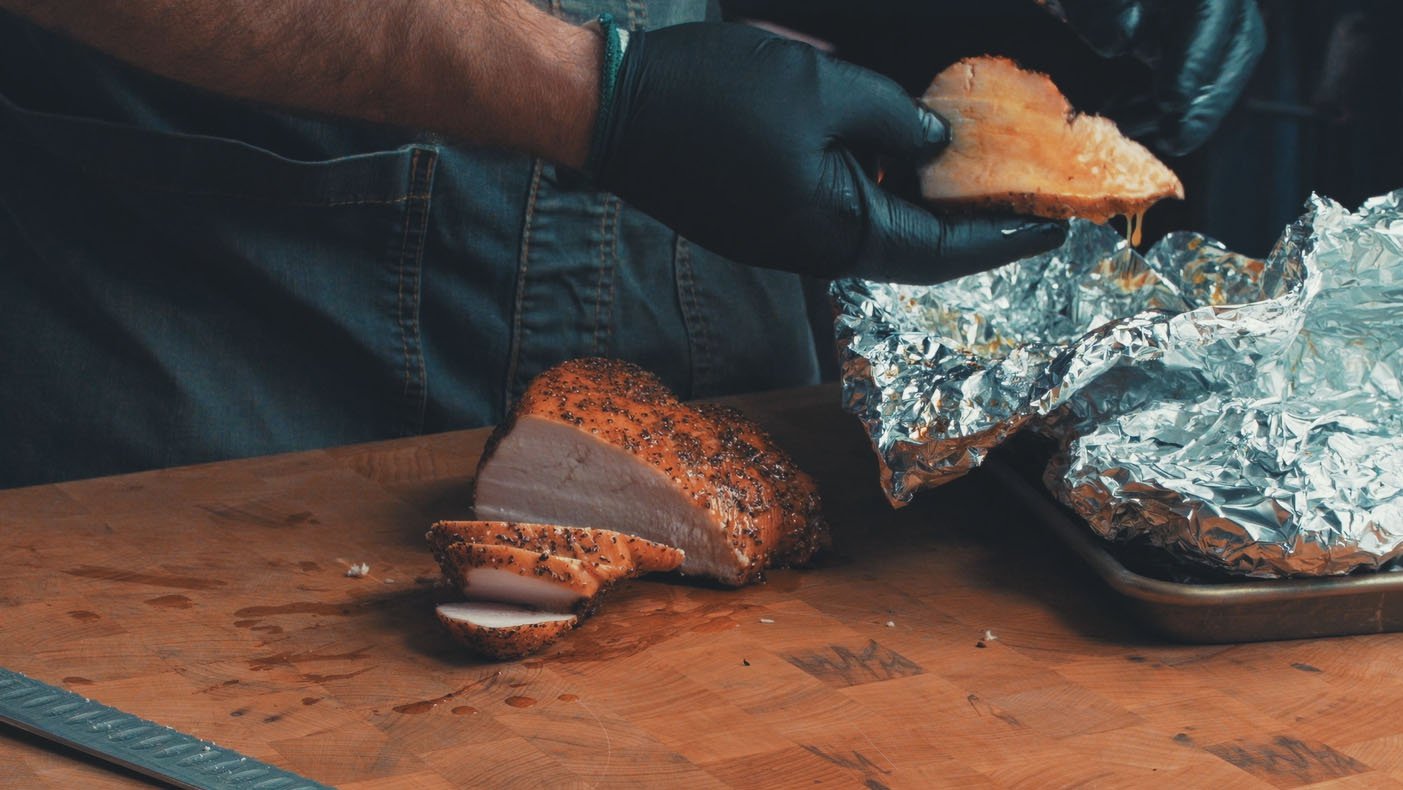
Once the turkey hits its mark, carve it, plate it, and take a moment to enjoy the reaction around the table. The mix of smoke, crisp skin, and juicy meat is the payoff for all your hard work and patience.
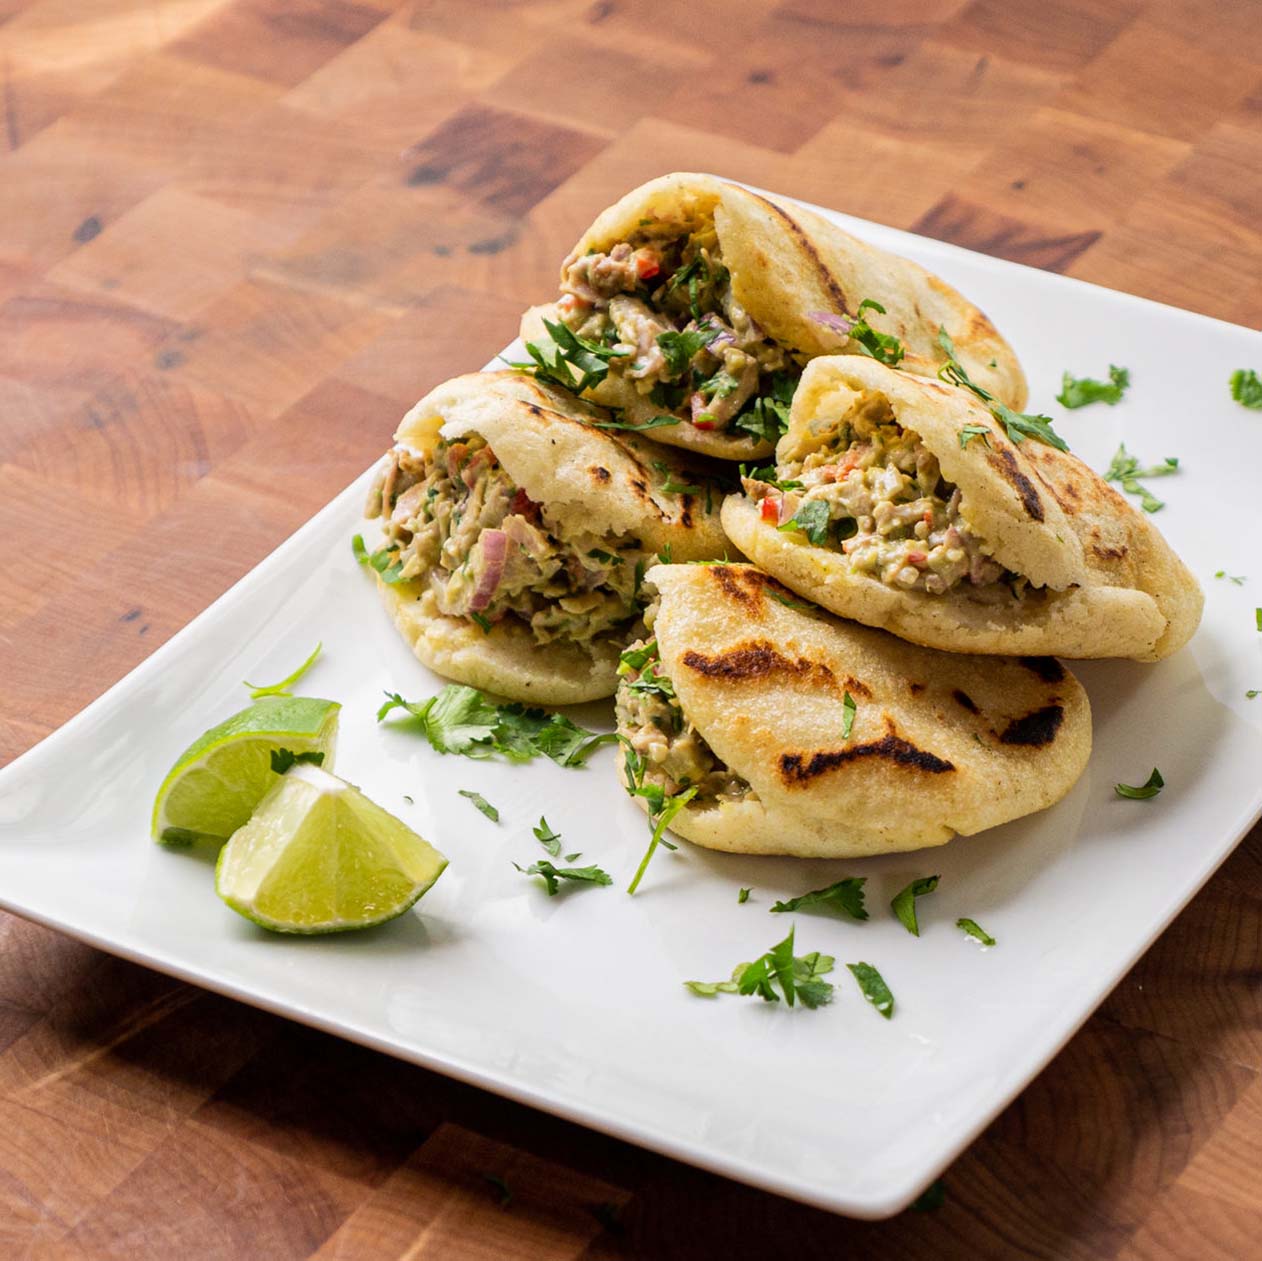
If you have leftovers, you’re in luck. Smoked turkey makes the next few days just as good as the holiday itself. Try it in:
-
Smoked turkey sandwiches with cranberry mayo
-
White chili
-
Turkey hash for breakfast
-
A classic Kentucky Hot Brown
Pair your smoked turkey with sides that can hold their own, like roasted sweet potatoes, Southern Style Collard Greens, charred green beans, or a bright citrus salad that balances the richness of the meat.

Frequently Asked Questions
How Long Does It Take to Smoke (or Cook) a Turkey?
Plan for about 2½ to 3 hours at 325°F for a 14–18 pound bird. Always cook to internal temperature, not time, since every turkey cooks a little differently. It’s also smart to build in a little wiggle room. Turkeys never seem to finish exactly when you expect, and the last thing you want is a room full of hungry guests standing around, tapping their shoes and checking their watches while you’re still waiting on the thermometer to hit 165°F.
Can I spatchcock the turkey?
Yes. Spatchcocking helps the bird cook faster and more evenly. You’ll lose that classic whole-bird look, but the trade-off is a shorter cook and more uniform doneness.
What is the best wood for smoking turkey?
Fruitwoods like apple, cherry, and peach add a subtle sweetness that enhances the brine and seasoning. Oak and Hickory provides a deeper, more traditional BBQ flavor. Avoid mesquite unless you want a very strong, earthy, acrid smoke.
Do I need to brine a pre-brined or injected turkey?
If the label says “pre-brined,” “self-basting,” or “contains up to 8% solution,” skip the full brine. Instead, soak the turkey in cold water overnight to draw out some of the salt, then follow the air-drying step for crispy skin.
How do I get extra crispy skin on a smoked turkey?
The secret is in the prep. Let the skin dry in the refrigerator overnight before cooking. This forms a pellicle that allows the smoke and heat to cling evenly. A light coat of butter or canola oil before it hits the smoker helps deepen the color and trigger the Maillard effect for that golden, crispy finish.
Can I stuff the turkey before smoking?
No. Stuffing prevents the bird from cooking evenly and can create food safety issues when smoked at lower temperatures. Cook the stuffing separately in the oven and add it when serving.
Final Thoughts
This smoked turkey delivers everything the traditional oven bird never could. It is juicy, flavorful, and kissed with just enough smoke to make it unforgettable. Once you make it this way, there is no going back to roasting.
Trust your thermometer, keep your temperature steady, and enjoy your well-earned title as the family’s official holiday pitmaster. When your guests go back for seconds, smile and remember that this year nobody needed gravy to lube up a dry bird just to choke it down.

Smoked Turkey Recipe: Juicy, Flavorful, and Easy to Master
Equipment
- Smoker
- Food safe 5-gallon bucket with lid or correctly sized cooler.
- Wire rack and sheet pan for air-drying
- Meat thermometer or probe thermometer
- Kitchen Twine for Trussing
- Aluminum foil
- cutting board and carving knife
- cotton liner gloves and nitrile gloves for handling hot meat
Ingredients
- 1 14-18 pound turkey with offal removed
- ½ gallon water (for bring base)
- 1.5 cups Kosher Salt
- 2 cups Sorghum or Molasses
- 2 Lemons Halved
- 2 Oranges Halved
- ½ cup Cajun seasoning such as Tony Chachere's
- 10 pounds Ice
- 3 tablespoon melted butter or canola oil for the skin
- 2 tablespoon favorite bbq rub (optional)
Instructions
- Make the brine. Add ½ gallon water to a large stockpot and bring to a boil. Add kosher salt, sorghum, lemons, oranges, and Cajun seasoning. Stir until the salt and sorghum dissolve. Remove from heat and let cool slightly.
- Set up the brining bucket. Add about 7 pounds of ice to a clean 5-gallon bucket. Pour in the cooled brine.
- Prep the turkey for brining. Remove the neck and giblets from the cavity. Submerge the thawed turkey completely in the brine. Top with the remaining ice and weigh it down with a plate if it floats. Keep the brine under 40°F. Brine 12 to 24 hours, about 1 hour per pound.
- Optional crispy skin step. Remove the turkey from the brine. Rinse under cool water and pat completely dry. Place on a wire rack set over a sheet pan and refrigerate uncovered for at least 8 hours to form a pellicle that promotes browning and crisp skin.
- Truss and season. Tie legs and wings snug to the body with twine. If desired, apply a very light dusting of BBQ rub.
- Preheat the smoker. Heat to 325°F. Choose light to medium smoke. Apple, cherry, or peach work well. Oak is fine if used lightly. Avoid mesquite for poultry.
- Prep the skin. Right before the turkey goes on the smoker, pat away any condensation. Brush a light coat of melted butter or canola oil over the skin. This promotes even browning and helps trigger the Maillard effect for a golden, crispy finish.
- Smoke the turkey. Place the turkey in the smoker. Cook at 325°F for about 2½ to 3 hours. Always cook to internal temperature, not time.
- Check doneness. Probe the deepest part of the thigh near the hip joint. Pull the turkey when dark meat reaches 165°F. The breast will usually be near 160°F and will finish with carryover heat.
- Rest and carve. Tent loosely with foil for 15 to 20 minutes. Carve and serve hot. If serving later, wrap and hold in a clean, warm cooler. Do not reuse the brining cooler unless it has been cleaned and sanitized thoroughly.
Notes
- Thawing guide: Plan ahead. Thaw in the refrigerator for about 24 hours per 4 to 5 pounds. Example timelines: 12 lb bird = about 3 days. 16 lb bird = about 4 days. 20 lb bird = about 5 days. Keep on a tray to catch drips. Never thaw at room temperature.
- Pre-brined or injected turkeys: If the label says pre-brined, self-basting, or contains up to 8 percent solution, skip the full brine. Soak in cold water overnight to reduce salt, then use the optional drying step for crisp skin.
- Wood choices: Fruitwoods give gentle, sweet smoke that suits poultry. Oak is stronger but still good. Use mesquite sparingly.
- Crispy skin key: The optional air-dry step forms a pellicle that helps the skin crisp. Apply the butter or oil only after drying and right before smoking.
- Trussing: Trussing helps the turkey cook evenly and look great on the table. If you need a refresher, see your How to Truss a Turkey guide.
- Thermometer tip: A fast, accurate thermometer prevents overcooking and keeps you from opening the smoker repeatedly and dumping heat.
- Serving idea: Slice into pencil-thick slices and spoon the buttery pan juices over the top.

Hi! I just found your website through Pintrest, and I love what I'm reading! I'm looking forward to learning more!
Thanks Raquel!
Interesting website, I enjoy reading it.
I have an electric smoker that has a max. temp. of 300 deg. F. It might be difficult to maintaain 300 in cold weather, to boot. Can it still be used to cook the turkey or must I use the oven? Any suggestions?
Aside from steaming, another healthier way to cook is through grilling. The superfluous fats drips down to the flaming charcoals that creates more smoke. This smoke gives a distinctive flavor to the meat or whatever it is that you are grilling.
Hi Andrew Thank You so much for a well informed narrative one Question what if I remove the skin from the turkey before I brine it